There are many acceptable JavaScript game engines out nowadays, but often you can get good performance from writing your own simple engine or renderer depending on your use case. The code for this project will be on my GitHub linked below.
What goes into writing a game engine?
Ideally, we want to handle a few important things.
- States, whether that be states of objects (alive, dead, moving, the type of enemy)
- Rendering
- Spawnable objects (with previously mentioned states)
- Input
- Save data
We approach this task with an object-oriented mindset instead of a functional programming mindset. Although there are a few global variables such as the overall running game state or the object pool arrays, most of the memory or information we need to remember occurs on a per-object basis.
We will be using a ‘Canvas‘ to draw our simple asteroid graphics. Writing a 3d renderer in JS is a much more complex task, although libraries like threeJS exist to get you started.
To begin with, we want to define a Vector2D class that we can reuse throughout our game. I’m familiar with Unity so I imagine an implementation similar to their engine’s GameObject setup, but any class that can read / write an X and Y will work.
var Vec2D = (function() {
var create = function(x, y) {
        var obj = Object.create(def);
        obj.setXY(x, y);

        return obj;
    };

    var def = {
        _x: 1,
        _y: 0,

        getX: function() {
            return this._x;
        },

        setX: function(value) {
            this._x = value;
        },

        getY: function() {
            return this._y;
        },

        setY: function(value) {
            this._y = value;
        },

        setXY: function(x, y) {
            this._x = x;
            this._y = y;
        },

        getLength: function() {
            return Math.sqrt(this._x * this._x + this._y * this._y);
        },

        setLength: function(length) {
            var angle = this.getAngle();
            this._x = Math.cos(angle) * length;
            this._y = Math.sin(angle) * length;
        },

        getAngle: function() {
            return Math.atan2(this._y, this._x);
        },

        setAngle: function(angle) {
            var length = this.getLength();
            this._x = Math.cos(angle) * length;
            this._y = Math.sin(angle) * length;
        },

        add: function(vector) {
            this._x += vector.getX();
            this._y += vector.getY();
        },

        sub: function(vector) {
            this._x -= vector.getX();
            this._y -= vector.getY();
        },

        mul: function(value) {
            this._x *= value;
            this._y *= value;
        },

        div: function(value) {
            this._x /= value;
            this._y /= value;
        }
    };

    return {
        create: create
    };
}());
This will allow us to reference positions easier. It’s vital to implement a few capabilities for our renderer. One important need is to be able to draw an object to our canvas at a specified position, and have the capability to clear said canvas, preparing for the next frame the game renders.
To draw a line, we can write JavaScript such as:
var c = document.getElementById("canvas");
var ctx = c.getContext("2d");
ctx.moveTo(0, 0);
ctx.lineTo(200, 100);
ctx.stroke();
And if we wanted to clear our canvas, we can use clearRect:
ctx.clearRect(0, 0, canvas.width, canvas.height);We can define a render function to handle our different objects.
window.getAnimationFrame =
    window.requestAnimationFrame ||
    window.webkitRequestAnimationFrame ||
    window.mozRequestAnimationFrame ||
    window.oRequestAnimationFrame ||
    window.msRequestAnimationFrame ||
function(callback) {
    window.setTimeout(callback, 16.6);
};
render(){
    context.clearRect(0,0,screenWidth,screenHeight);
    renderShips();
    renderAsteroids();
    renderBullets();
    getAnimationFrame(loop);
}

renderShips(){
    ship.renderSelf();
    for (int i = 0; i < enemies.length; i++)
    enemies.renderSelf();
}
...etc
Then an example render self function:
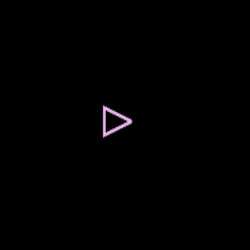
renderSelf: function() {
    if (this.hasDied)
        return;
    context.save();
    context.translate(this.pos.getX() >> 0, this.pos.getY() >> 0);
    context.rotate(this.angle);
    context.strokeStyle = playerColor;
    context.lineWidth = (Math.random() > 0.9) ? 4 : 2;
    context.beginPath();
    context.moveTo(10, 0);
    context.lineTo(-10, -10);
    context.lineTo(-10, 10);
    context.lineTo(10, 0);
    context.stroke();
    context.closePath();

    context.restore();
}
Which would render our object assuming a class holding some variables with our Vector2 class we described earlier.
var Ship = (function() {
var create = function(x, y, ref) {
    var obj = Object.create(def);
    obj.ref = ref;
    obj.angle = 0;
    obj.pos = Vec2D.create(x, y);
    obj.vel = Vec2D.create(0, 0);
    obj.thrust = Vec2D.create(0, 0);
    obj.invincible = false;
    obj.hasDied = false;
    obj.radius = 8;
    obj.idleDelay = 0;
    obj.isSpectating = false;

    return obj;
};
...etc
We are handling rendering and state management from inside an object now. All that just for a triangle.
We aren’t done yet. Next we need to handle Input. The goal with creating object classes is reusability and extensibility. We don’t need to spawn multiple instances of an input, so we can handle that globally. Your Input function may look something like this:
window.onkeydown = function(e) {
    switch (e.keyCode) {
        //key A or LEFT
        case 65:
        case 37:
            keyLeft = true;
            break;
            //key W or UP
        case 87:
        case 38:
            keyUp = true;
            break;
            //key D or RIGHT
        case 68:
        case 39:
            keyRight = true;
            break;
            //key S or DOWN
        case 83:
        case 40:
            keyDown = true;
            break;
            //key Space
        case 32:
        case 75:
            keySpace = true;
            break;
            //key Shift
        case 16:
            keyShift = true;
            break;
    }

    e.preventDefault();
};

window.onkeyup = function(e) {
    switch (e.keyCode) {
        //key A or LEFT
        case 65:
        case 37:
            keyLeft = false;
            break;
            //key W or UP
        case 87:
        case 38:
            keyUp = false;
            break;
            //key D or RIGHT
        case 68:
        case 39:
            keyRight = false;
            break;
            //key S or DOWN
        case 83:
        case 40:
            keyDown = false;
            break;
            //key Space
        case 75:
        case 32:
            keySpace = false;
            break;
            //key Shift
        case 16:
            keyShift = false;
            break;
    }

    e.preventDefault();
};
e.preventDefault() will stop users from accidentally hitting keys such as ctrl + L and losing focus from the window, or jumping the page with Space, for instance.
function updateShip() {
    ship.update();

    if (ship.hasDied) return;

    if (keySpace) ship.shoot();
    if (keyLeft && keyShift) ship.angle -= 0.1;
    else if (keyLeft) ship.angle -= 0.05;
    if (keyRight && keyShift) ship.angle += 0.1;
    else if (keyRight) ship.angle += 0.05;

    if (keyUp) {
        ship.thrust.setLength(0.1);
        ship.thrust.setAngle(ship.angle);
    } else {
        ship.vel.mul(0.94);
        ship.thrust.setLength(0);
    }

    if (ship.pos.getX() > screenWidth) ship.pos.setX(0);
    else if (ship.pos.getX() < 0) ship.pos.setX(screenWidth);

    if (ship.pos.getY() > screenHeight) ship.pos.setY(0);
    else if (ship.pos.getY() < 0) ship.pos.setY(screenHeight);
}

...etc

function checkDistanceCollision(obj1, obj2) {
    var vx = obj1.pos.getX() - obj2.pos.getX();
    var vy = obj1.pos.getY() - obj2.pos.getY();
    var vec = Vec2D.create(vx, vy);

    if (vec.getLength() < obj1.radius + obj2.radius) {
        return true;
    }

    return false;
}

...etc
Once we have the ability to render a reusable object to a canvas and read / write a position that can be checked, we use that as a template to create other objects (particles, asteroids, other ships).
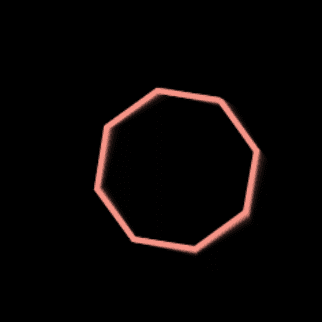
You can make interesting graphics with just basic shapes. We handle collision by assigning either an xWidth and yWidth + xOffset and yOffset, OR a radius. This again would be assigned to the object itself to keep track of.
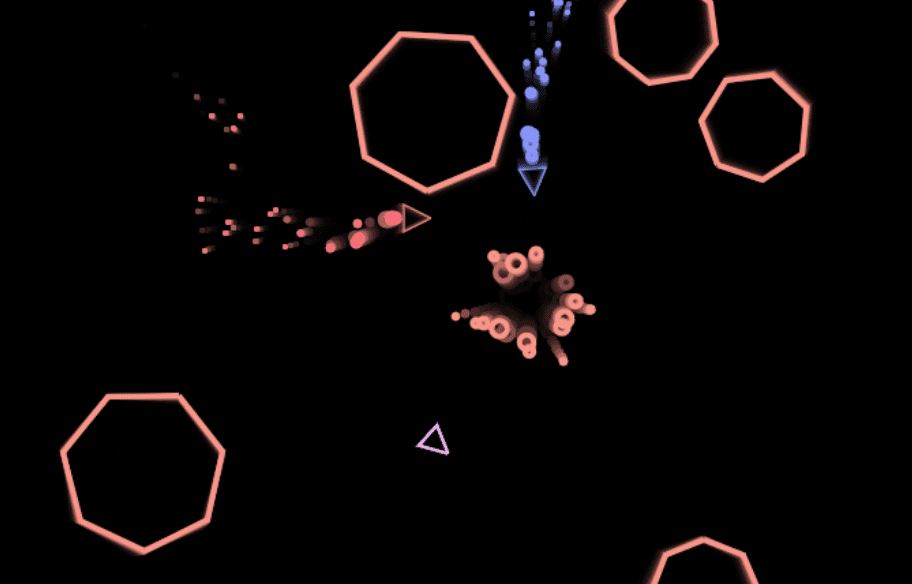
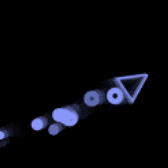
Further Techniques
If we can control the rendering manually we can leave an ‘afterimage’ on our canvas before rendering the next frame as opposed to clearing it entirely. To do this, we can manipulate the canvas’ global alpha.
// Get the canvas element and its 2D rendering context
const canvas = document.getElementById('myCanvas');
const ctx = canvas.getContext('2d');
// Set the initial alpha value
let alpha = 0.1; // You can adjust this value to control the fading speed
// Function to create the afterimage effect
function createAfterimage() {
    // Set a semi-transparent color for the shapes
    ctx.fillStyle = `rgba(255, 255, 255, ${alpha})`;
    // Fill a rectangle covering the entire canvas
    ctx.fillRect(0, 0, canvas.width, canvas.height);
    // Decrease alpha for the next frame
    alpha *= 0.9; // You can adjust this multiplier for a different fade rate
    // Request animation frame to update
    requestAnimationFrame(createAfterimage);
}
// Call the function to start creating the afterimage effect
createAfterimage();
And a simple localStorage can be used to save scores.
function checkLocalScores() {
if (localStorage.getItem("rocks") != null) {
visualRocks = localStorage.getItem("rocks");
}
if (localStorage.getItem("deaths") != null) {
visualDeaths = localStorage.getItem("deaths");
}
if (localStorage.getItem("enemyShips") != null) {
visualEnemyShips = localStorage.getItem("enemyShips");
}
updateVisualStats();
}
function saveLocalScores() {
localStorage.setItem("rocks", visualRocks);
localStorage.setItem("deaths", visualDeaths);
localStorage.setItem("enemyShips", visualEnemyShips);
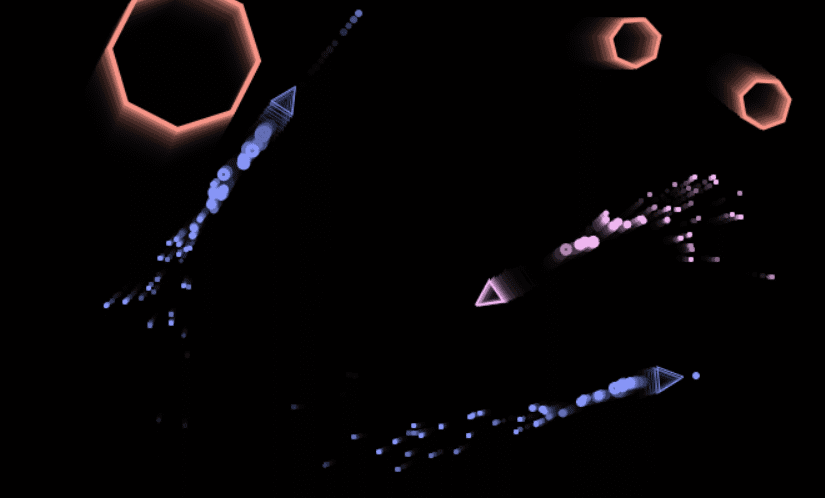
}End Result
You can see and play the game here.
It helps me if you share this post
https://rose.dev/blog/2023/11/30/pure-javascript-asteroids-clone-with-enemy-ships-source-code/
Published 2023-11-30 23:51:07
how can we control on mobile?