Unity Shaders Intro Part 2: HLSL/CG | Edge Distortion Effects

I recently saw these UI effects in a game called Cult of the Lamb and they were very satisfying to watch. Let’s learn how to create our own types of effects like these.

Prerequisites

  • Unity (I’m using 2022.3.17f)
  • Photo editing software (Aseprite, Photoshop, etc)
  • Seamless perlin noise generator for the noise texture we will need later

Base 2D Shader

Create a basic empty file with the ‘.shader’ extension in your Unity project or Right click > Shader > Standard Surface Shader

Shader "Custom/EdgeShader" 
{
	Properties 
	{
	}
	
	SubShader
	{		
		Pass 
		{
			CGPROGRAM
			ENDCG
		}
	}
}

We want to begin with a base shader to manipulate, so let’s start by displaying a sprite.

Our shader must expose it to the editor in order to set our texture. Add a line under our properties defining a main texture.

_MainTex ("Base (RGB) Trans (A)", 2D) = "white" {}

And the variable under SubShader.

sampler2D _MainTex;
float4 _MainTex_ST;

The _ST value will contain the tiling and offset fields for the material texture properties. This information is passed into our shader in the format we specified.

Now define the vertex and fragment functions.

struct vct 
{
	float4 pos : SV_POSITION;
	float2 uv : TEXCOORD0;
};

vct vert_vct (appdata_base v) 
{
	vct o;
	o.pos = UnityObjectToClipPos(v.vertex);
	o.uv = TRANSFORM_TEX(v.texcoord, _MainTex);
	return o;
}

fixed4 frag_mult (vct i) : COLOR 
{
	fixed4 col = tex2D(_MainTex, i.uv);
	col.rgb = col.rgb * col.a;
	return col;
}

Simple enough.

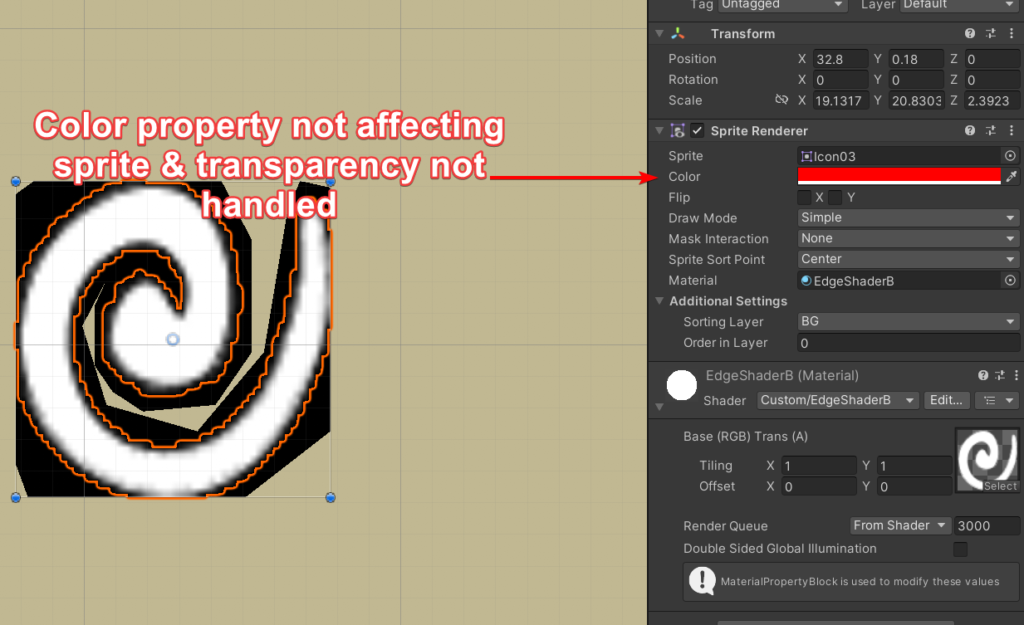
…or is it? That doesn’t look like it’s working properly. Let’s fix it.

We can add a Blend under our tags to fix the transparency issue.

Blend SrcAlpha OneMinusSrcAlpha
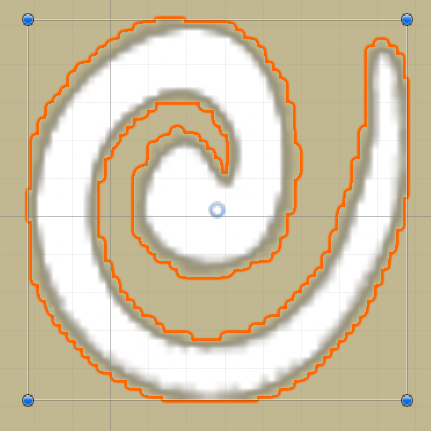
And we can just add the color property to our shader. At this point, we can display 2D sprites on the screen, yay!

Shader "Custom/EdgeShaderB" 
{
    Properties 
    {
        _MainTex ("Base (RGB) Trans (A)", 2D) = "white" {}
    }
    
    SubShader
    {		
        Tags {"Queue"="Transparent" "IgnoreProjector"="True" "RenderType"="Transparent"}
        Blend SrcAlpha OneMinusSrcAlpha
        
        Pass 
        {
            CGPROGRAM
            #pragma vertex vert_vct
            #pragma fragment frag_mult 
            #include "UnityCG.cginc"

            sampler2D _MainTex;
            float4 _MainTex_ST;
            
            struct vct 
            {
                float4 vertex : POSITION;
                fixed4 color : COLOR;
                float2 texcoord : TEXCOORD0;
            };

            vct vert_vct(vct v)
            {
                vct o;
                o.vertex = UnityObjectToClipPos(v.vertex);
                o.color = v.color;
                o.texcoord = v.texcoord;
                return o;
            }

            fixed4 frag_mult (vct i) : COLOR
            {
                fixed4 col = tex2D(_MainTex, i.texcoord) * i.color;
                return col;
            }

            ENDCG
        }
    }
}

Now we can start messing with things.

Edge Distortion Shader

We want to add some movement and distortion to our sprite. Begin with movement.

How can we manipulate our shader pixels? Let’s show an example by modifying our main texture. We’ll simply change the position. To do so, we can do something simple like shifting the texture coordinate down and to the left.

fixed4 frag_mult (vct i) : COLOR
{
	float2 shift = i.texcoord + float2(0.15, 0.25);
	fixed4 col = tex2D(_MainTex, shift) * i.color;

	return col;
}

Okay, now how about some movement?

fixed4 frag_mult (vct i) : COLOR
{
	float2 shift = i.texcoord + float2(cos(_Time.x * 2.0) * 0.2, sin(_Time.x * 2.0) * 0.2);
	fixed4 col = tex2D(_MainTex, shift) * i.color;

	return col;
}

If you examine your sprite at this point, you may notice some odd distortion as it moves.

Set your sprite’s import settings correctly!
Mesh Type: Full Rect
Wrap Mode: Repeat

Once you ensure your sprite has the correct import settings, it’s time to introduce our final 2d sprite we want to manipulate with the shader to achieve our effect.

This image will greatly change the shader appearance, and you should try different gradients and patterns. Here’s my image scaled up:
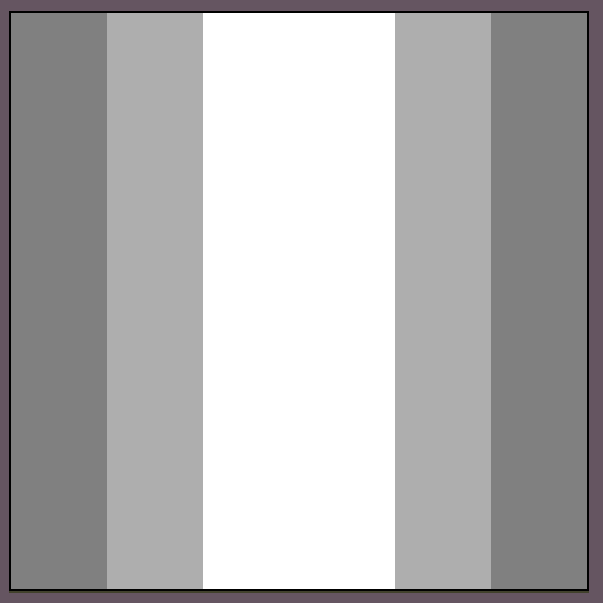
But I recommend using the smallest resolution that looks good for your project due to memory and performance.

yes it’s that small (12×12)

We also need a seamless noise texture, for the distortion.
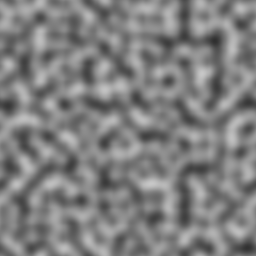
Let’s add another variable for it.

_NoiseTex ("Base (RGB) Trans (A)", 2D) = "white" {}

Once we’ve assigned our noise texture, it’s time to start moving it.

fixed4 frag_mult (vct i) : COLOR
{
	float2 shim = i.texcoord + float2(
		tex2D(_NoiseTex, i.vertex.xy/500 - float2(_Time.w/60, 0)).x,
		tex2D(_NoiseTex, i.vertex.xy/500 - float2(0, _Time.w/60)).y
	);
	fixed4 col = tex2D(_MainTex, shim) * i.color;
	return col;
}

Now, add the static sprite to its left in the same color and connect it vertically.

Adjusting the transparency will function as expected, so we could overlay this.

Shader "Custom/EdgeShader" 
{
    Properties 
    {
        _MainTex ("Base (RGB) Trans (A)", 2D) = "white" {}
        _NoiseTex ("Base (RGB) Trans (A)", 2D) = "white" {}
    }
    
    SubShader
    {		
        Tags {"Queue"="Transparent" "IgnoreProjector"="True" "RenderType"="Transparent"}
        Blend SrcAlpha OneMinusSrcAlpha 
        
        Pass 
        {
            CGPROGRAM
            #pragma vertex vert_vct
            #pragma fragment frag_mult 
            #include "UnityCG.cginc"

            sampler2D _MainTex;
            sampler2D _NoiseTex;
            float4 _MainTex_ST;
            float4 _NoiseTex_ST;
            
            struct vct 
            {
                float4 vertex : POSITION;
                fixed4 color : COLOR;
                float2 texcoord : TEXCOORD0;
            };

            vct vert_vct(vct v)
            {
                vct o;
                o.vertex = UnityObjectToClipPos(v.vertex);
                o.color = v.color;
                o.texcoord = v.texcoord;
                return o;
            }

            fixed4 frag_mult (vct i) : COLOR
            {
                    float2 shim = i.texcoord + 
                float2(tex2D(_NoiseTex, i.vertex.xy/500 - float2(_Time.w/60, 0)).x,
                tex2D(_NoiseTex, i.vertex.xy/500 - float2(0, _Time.w/60)).y);
                fixed4 col = tex2D(_MainTex, shim) * i.color;
                return col;
            }

            ENDCG
        }
    }
}

Crown Shader

Here’s my quick little crown sprite.

Let’s make it evil.

We can repurpose the wall shader we just created and scale down the distortion as well as smoothing it

fixed4 frag_mult(v2f_vct i) : COLOR
{
    float2 shim = i.texcoord + float2(
        tex2D(_NoiseTex, i.vertex.xy/250 - float2(_Time.w/7.2, 0)).x,
        tex2D(_NoiseTex, i.vertex.xy/250 - float2(0, _Time.w/7.2)).y
    )/ 20;

    fixed4 col = tex2D(_MainTex, col) * i.color;

    return col;
}

Then we can add another pass to handle the normal sprite display.

Shader "Custom/CrownShader" 
{
    Properties 
    {
        _MainTex ("Base (RGB) Trans (A)", 2D) = "white" {}
        _NoiseTex ("Base (RGB) Trans (A)", 2D) = "white" {}
        _SpriteColor ("Color Tint Mult", Color) = (1,1,1,1)
    }
    
    SubShader
    {
        Tags {"Queue"="Transparent" "IgnoreProjector"="True" "RenderType"="Transparent"}
        Blend SrcAlpha OneMinusSrcAlpha
        
        Pass 
        {
            CGPROGRAM
            #pragma vertex vert_vct
            #pragma fragment frag_mult 
            #pragma fragmentoption ARB_precision_hint_fastest
            #include "UnityCG.cginc"

            sampler2D _MainTex;
            sampler2D _NoiseTex;
            float4 _MainTex_ST;
            float4 _NoiseTex_ST;

            struct vct
            {
                float4 vertex : POSITION;
                float4 color : COLOR;
                float2 texcoord : TEXCOORD0;
            };

            vct vert_vct(vct v)
            {
                vct o;
                o.vertex = UnityObjectToClipPos(v.vertex);
                o.color = v.color;
                o.texcoord = v.texcoord;
                return o;
            }

            fixed4 frag_mult(vct i) : COLOR
            {
                float2 shim = i.texcoord + float2(
                    tex2D(_NoiseTex, i.vertex.xy/250 - float2(_Time.w/7.2, 0)).x,
                    tex2D(_NoiseTex, i.vertex.xy/250 - float2(0, _Time.w/7.2)).y
                )/ 20;

                shim *= float2(0.97, 0.91);
                shim -= float2(0.01, 0);

                fixed4 col = tex2D(_MainTex, shim) * i.color;
                return col;
            }
            
            ENDCG
        } 
        Pass 
        {
            CGPROGRAM
            #pragma vertex vert_vct
            #pragma fragment frag_mult 
            #pragma fragmentoption ARB_precision_hint_fastest
            #include "UnityCG.cginc"

            sampler2D _MainTex;
            sampler2D _NoiseTex;
            float4 _MainTex_ST;
            float4 _NoiseTex_ST;

            float4 _SpriteColor;

            struct vct 
            {
                float4 vertex : POSITION;
                float4 color : COLOR;
                float2 texcoord : TEXCOORD0;
            };

            vct vert_vct(vct v)
            {
                vct o;
                o.vertex = UnityObjectToClipPos(v.vertex);
                o.color = v.color;
                o.texcoord = v.texcoord;
                return o;
            }

            fixed4 frag_mult(vct i) : COLOR
            {
                float2 uv = i.texcoord;
                uv -= 0.5;
                uv *= 1.1;
                uv += 0.5;

                fixed4 col = tex2D(_MainTex, uv);
                col.rgb = _SpriteColor.rgb;

                return col;
            }
            
            ENDCG
        } 
    }
}

Source


It helps me if you share this post

Published 2024-01-26 06:00:00

Carbon Coding Language: Google’s Experimental Successor to C++

On July 19th 2022, Google introduced Carbon Language. What exactly is Carbon, and what does it aim to achieve? Note that the Carbon coding language is experimental.

To understand Carbon, we first need to take a look at the language it’s attempting to augment. That is, C++. It remains the dominant programming language for performance critical software, and has been a stable foundation for massive codebases. However, improving C++ is extremely difficult. This is due to a few reasons:

  • Decades of technical debt
  • Prioritizing backwards compatibility over new features
  • C++, ideally, is about standardization rather than design

Carbon, as Google puts it, is okay with “exploring significant backwards incompatible changes”. This has pros for those wanting to work with a language developing with the mindset of “move fast and break things”.

Carbon promises a few things in their readme:

Carbon is fundamentally a successor language approach, rather than an attempt to incrementally evolve C++. It is designed around interoperability with C++ as well as large-scale adoption and migration for existing C++ codebases and developers. A successor language for C++ requires:

  • Performance matching C++, an essential property for our developers.
  • Seamless, bidirectional interoperability with C++, such that a library anywhere in an existing C++ stack can adopt Carbon without porting the rest.
  • A gentle learning curve with reasonable familiarity for C++ developers.
  • Comparable expressivity and support for existing software’s design and architecture.
  • Scalable migration, with some level of source-to-source translation for idiomatic C++ code.

Google wants Carbon to fill an analogous role for C++ in the future, much like TypeScript or Kotlin does for their respective languages.

JavaScript → TypeScript
Java → Kotlin
C++ → Carbon?

Talk is cheap, show me the code

Okay, so what does Carbon look like then?

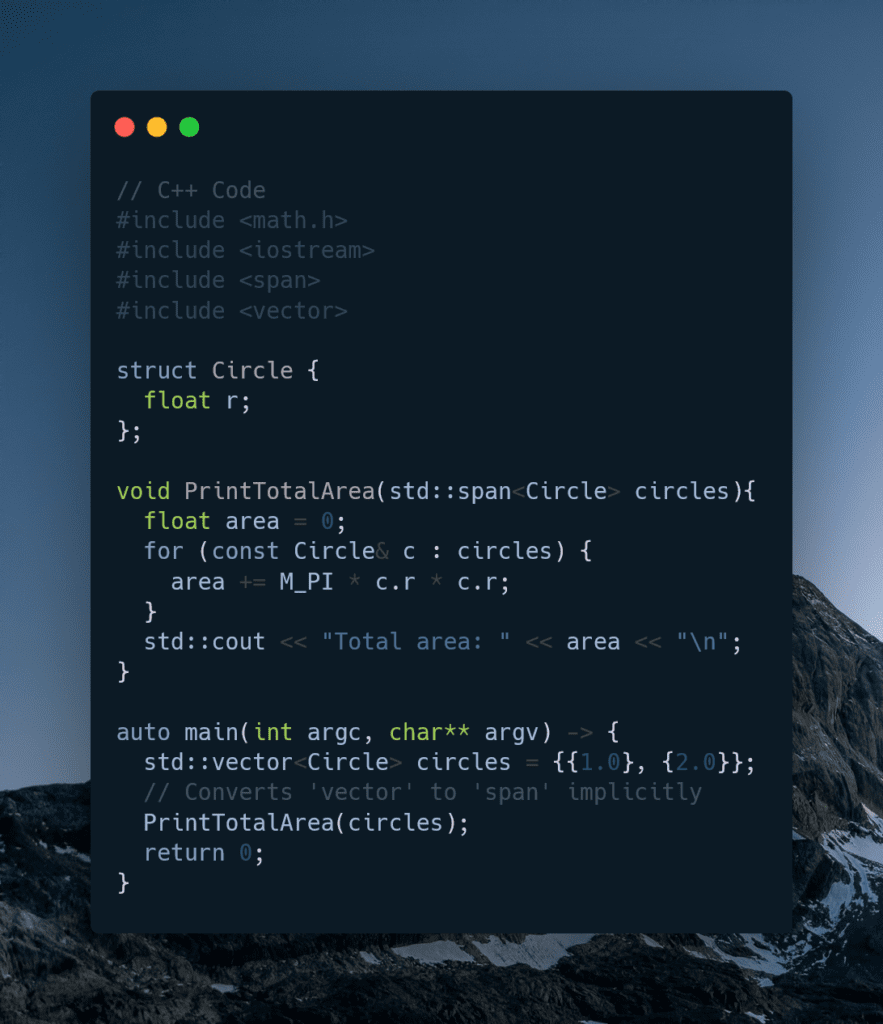
First, let’s see how to calculate the area of a circle in C++.

// C++ Code
#include <math.h>
#include <iostream>
#include <span>
#include <vector>

struct Circle {
  float r;
};

void PrintTotalArea(std::span<Circle> circles){
  float area = 0;
  for (const Circle& c : circles) {
    area += M_PI * c.r * c.r;
  }
}

auto main(int argc, char** argv) -> {
  std::vector<Circle> circles = {{1.0}, {2.0}};
  // Converts 'vector' to 'span' implicitly
  PrintTotalArea(circles);
  return 0;
}
C++ coding example

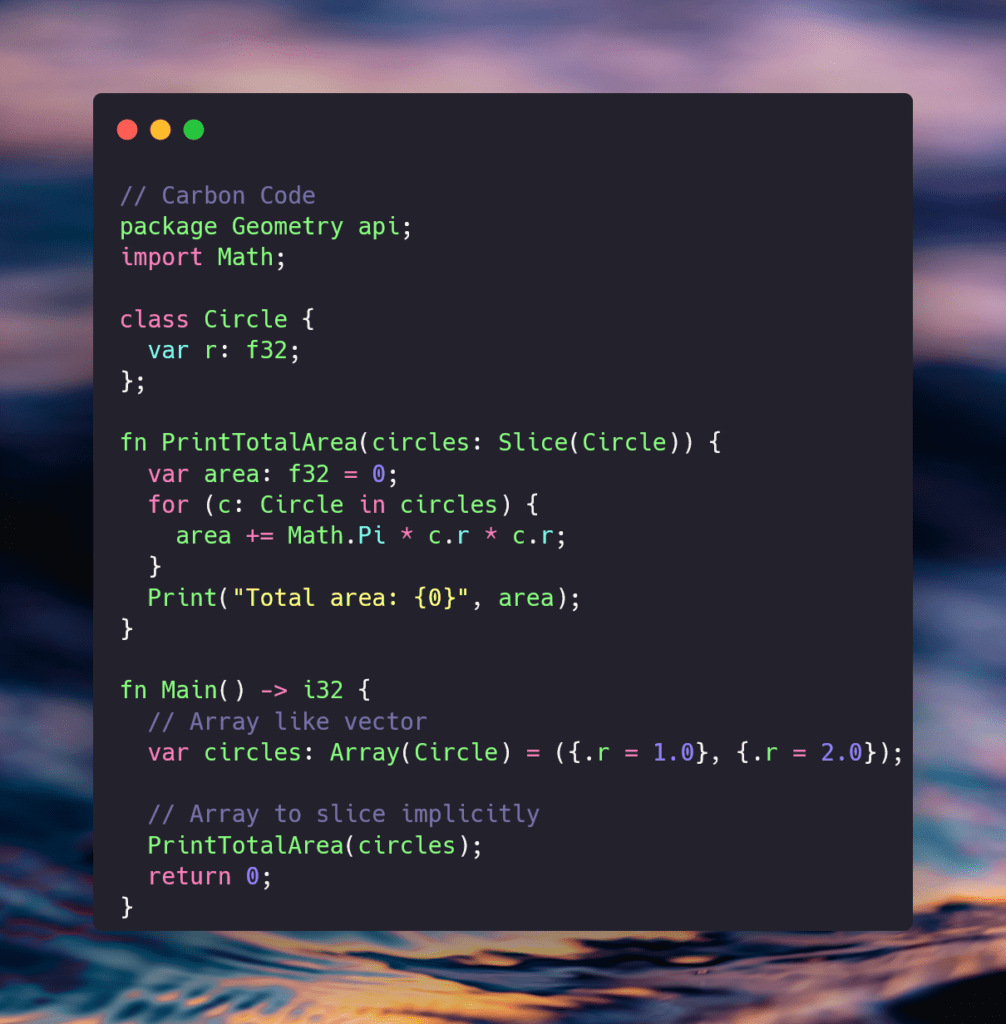
Compared to Carbon:

// Carbon Code
package Geometry api;
import Math;

class Circle {
  var r: f32;
};

fn PrintTotalArea(circles: Slice(Circle)) {
  var area: f32 = 0;
  for (c: Circle in circles) {
    area += Math.Pi * c.r * c.r;
  }
}

fn Main() -> i32 {
  // Array like vector
  var circles: Array(Circle) = ({.r = 1.0}, {.r = 2.0});
  
  // Array to slice implicitly 
  PrintTotalArea(circles);
  return 0;
}
Carbon coding example

My initial thoughts are that the syntax looks mixed between C#, JavaScript, and C++. Prepending “var” before each variable seems redundant. Why not a type name followed by a declaration? One might argue that it leads to easy variable identification without memorization of variable types but that makes little sense as you put the type anyway. The way variables are initialized with “:” instead of =, reminds me of Javascript. Not sure if that’s a good thing, it looks less like C++ than I expected. Oddly, they chose “import” for the system packages it seems which is also shared with Python. I do like the shortening of function to fn. You could argue shorthand is the point because it’s cleaner and smaller, but again why is it defined as a function and then an ‘i32’? Seems redundant. unless they decided fn FunctionName() -> i32 is shorter than int FunctionName(). It could be their goal is simply to separate the syntax from other known languages enough to recognize at a glance. Maybe I’m missing something.

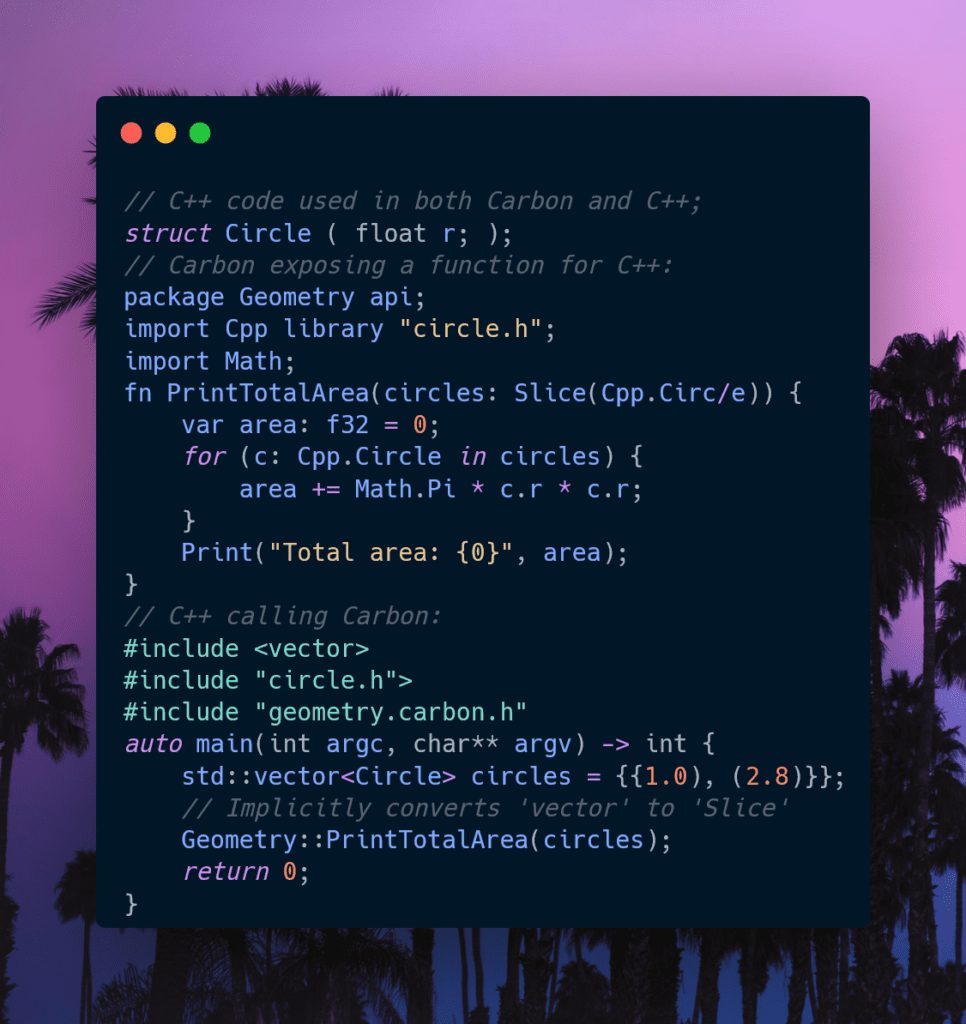
One neat feature they’ve shown is the interoperability between Carbon and C++. You can call C++ from Carbon and vice versa. You can rewrite or replace as little or as much of your libraries as you want without fear of breaking anything. Well, at least without breaking anything more than normal when dealing with C++.

// C++ code used in both Carbon and C++;
struct Circle ( float r; ); 
// Carbon exposing a function for C++:
package Geometry api; 
import Cpp library "circle.h";
import Math; 
fn PrintTotalArea(circles: Slice(Cpp.Circ/e)) {
    var area: f32 = 0;
    for (c: Cpp.Circle in circles) { 
        area += Math.Pi * c.r * c.r;
    } 
    Print("Total area: {0}", area); 
}
// C++ calling Carbon:
#include <vector>
auto main(int argc, char** argv) -> int { 
    std::vector<Circle> circles = {{1.0), (2.8)}}; 
    Geometry::PrintTotalArea(circles);
    return 0; 
}
C++ code used in both Carbon and C++

And better memory safety is also promised

Safety, and especially memory safety, remains a key challenge for C++ and something a successor language needs to address. Our initial priority and focus is on immediately addressing important, low-hanging fruit in the safety space:

  • Tracking uninitialized states better, increased enforcement of initialization, and systematically providing hardening against initialization bugs when desired.
  • Designing fundamental APIs and idioms to support dynamic bounds checks in debug and hardened builds.
  • Having a default debug build mode that is both cheaper and more comprehensive than existing C++ build modes even when combined with Address Sanitizer.

Time will tell if the language develops into a developer favorite or fades into obscurity like Dlang. What, you haven’t heard of D?


It helps me if you share this post

Published 2022-08-03 00:19:33